
It’s been the little whispers on the breeze this year, that far off calling, it’s niggling at you now… You’ve heard about Firefox OS (or ‘Boot to Gecko’), you’ve read about Firefox OS, but you haven’t had a chance to have a play with it yourself. Today I want you to take some time for yourself, away from distractions, put your phone on silent, close your Twitter client, ignore your emails, we’re going to see what it’s all about.
But what is it?
An OS! :) One that is completely open source and has been developed using the same rendering engine as Firefox (Gecko). Which means apps are developed in everyday web technologies: HTML, CSS and Javascript. The big project at the moment is Gaia, which is a smart phone OS built on top of the Boot to Gecko technology.
Two preview phones running FirefoxOS have been released by Geeksphone specifically for developers: The Peak and the Keon. However the scope for other devices is endless – it has already been booted on a Raspberry Pi.
In this tutorial I want to take you over the basics of making an app. Wait, what? You already know some/a lot of HTML, CSS and Javascript? Then I hope you’re ready to have your mind blown, because that is all you need!
I don’t have a Geeksphone :( can I run it?
You sure can. The easiest way to do this is to simulate it on your computer. Firstly make sure you have Firefox nightly downloaded and installed, then grab the simulator add on here and click on the install link for your relative platform.
N.B. The simulator will work just fine with the regular Firefox browser, (as long as you check it’s updated), however it is recommended you use Nightly so you have the most up to date version of Gecko.
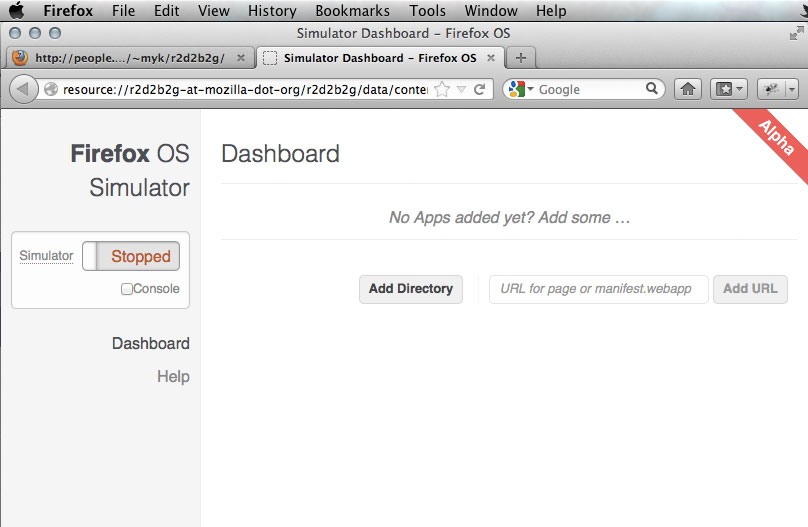
Once downloaded and installed you should be looking at something like this:
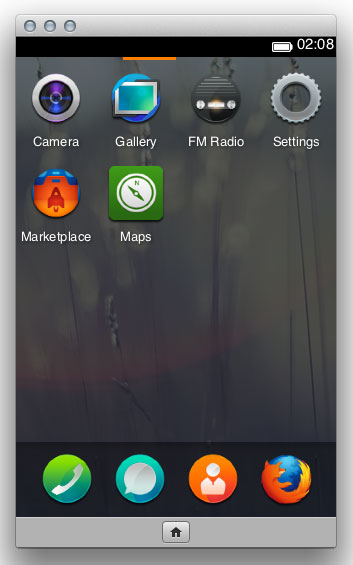
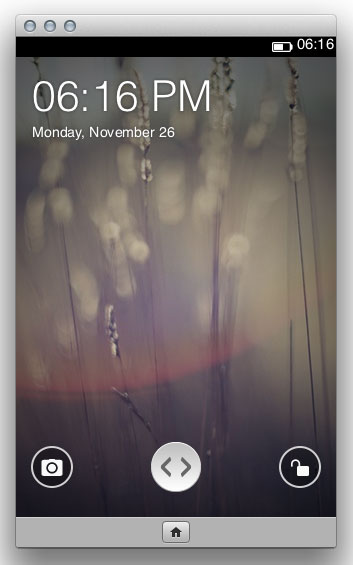
If this tab hasn’t opened, you can load it from the menu; Tools -> Web Developer -> Firefox OS Simulator. Go ahead and click on the ‘Stopped’ link… wait, what’s this? Something’s happening… Wahay! And we’re simulating Firefox OS:
Slide the button to the unlock icon and have a look around. Click and hold to slide (or if you prefer keyboard shortcuts: On a Mac fn + rightarrow and fn + leftarrow, or home and end keys on Linux, can help you navigate). There are plenty of apps there already – one of my favourites is CrystalSkull, it’s shiny :) gets distracted… sorry. Must. Stop. Rotating. Skull.
It’s also worth bearing in mind at this point that Firefox OS and Gaia are still very much in development (as are most of the apps) and you can see on the simulator add-on screen that it’s only in ‘Alpha’, so please bear with any glitches.
So let’s roll!
If we hop back to the add on page in Firefox, we can see there are two options for installing an app in the simulator. You can choose a local file, or you can link to a URL. Here we’re going to do the former. So let’s start creating some app files.
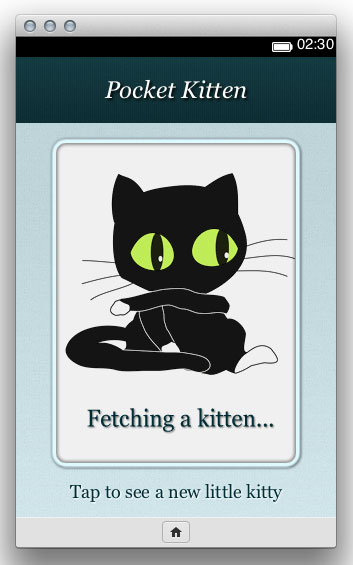
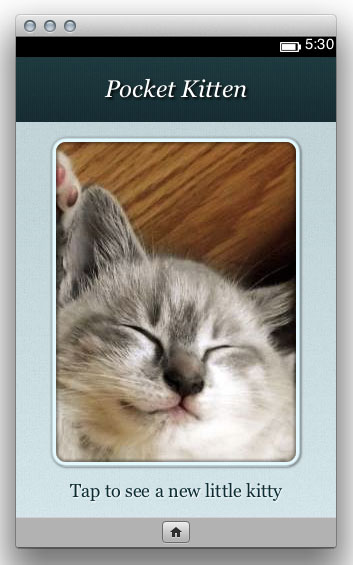
The app we’re going to build here is called Pocket Kitten. It displays a picture of a kitten, and when you tap the device is displays a different picture of a kitten. Begin by creating a folder for your app and inside that create two more folders, one for your CSS (style) and one for your javascript (js). The first file we need is manifest.webapp, this just sets up some data (and permissions if you’re using web APIs), in json format, about our app.
{
  "name": "Pocket Kitten",
  "description": "Calm yourself with a kitten",
  "launch_path": "/Pocket-Kitten/index.html",
  "developer": {
    "name": "Ruth John",
    "url": "https://github.com/rumyra"
  },
  "icons": {
    "128": "style/icons/[email protected]",
    "64": "style/icons/pocket-kitten.png"
  },
  "orientation": "portrait-primary"
}
We also need an icon for our app. Well two actually, one double the size of the other for retina displays.


We’ll pop them in a style/icons folder, like we specified in the manifest.webapp file.
This is going to be a one page app to keep things simple, so let’s create our only HTML file, index.html. All we need for this app is the app name as a heading and the image of a kitten.
<!DOCTYPE html>
<html>
  <head>
    <meta charset="utf-8" />
    <meta http-equiv="pragma" content="no-cache" />
    <title>Pocket Kitten</title>

    <link rel="stylesheet" type="text/css" href="style/pocket-kitten.css"/>
    <script defer type="application/javascript" src="js/pocket-kitten.js"></script>
  </head>
  <body role="application">
    <section role="region">
      <header aria-level="1">
        <h1>Pocket Kitten</h1>
      </header>

      <figure class="show-kitten">
        <div>
          <img id="kitten-image" src="/style/images/fetching.gif" alt="A picture of a kitten" />
          <span></span>
        </div>
        <figcaption>Tap to see a new little kitty</figcaption>
      </figure>
    </section>
  </body>
</html>
We can now open index.html in Firefox Nightly and we can develop Pocket Kitten in the browser for the next bit. If we set the view to be the same dimensions as the simulator, we can see what the app will look like as we add CSS. Go to Tools -> WebDeveloper -> Responsive Design View and choose 320×480 from the drop down that appears.
So let’s get cracking with a little CSS. I’m going to create a custom design, which is always advised with FirefoxOS apps. There has been a pattern library, Gaia building blocks, created for Gaia develpment, but part of the point about harnessing open web technologies is we can have any app look any which way we want… yay!
As it’s such a small example, I have only one CSS file style/pocket-kitten.css:
html, body {
  margin: 0;
  padding: 0;
  font-size: 10px;
  font-family: "Georgia", serif;
  line-height: 1;
  overflow: hidden;
}

section[role="region"] {
  position: absolute;
  top: 0;
  left: 0;
  width: 100%;
  height: 100%;
  border: 0;
  overflow-x: hidden;
  overflow-y: scroll;
  background-image:
    -moz-linear-gradient(top, rgba(141,186,196,0.5) 30%, rgba(178,220,230,0.5)),
    url('images/gray_jean.png')
  ;
}

header {
  text-align: center;
  color: white;
  padding: 1px 0px;
  background-image:
    -moz-linear-gradient(top, rgba(9,64,72,0.7), rgba(0,44,52,0.7)),
    url('images/classy_fabric.png')
  ;
}

h1 {
  font-weight: normal;
  font-size: 24px;
  font-style: italic;
  text-shadow: 2px 2px 2px black;
}

.show-kitten div {
  margin: 20px auto;
  height: 320px;
  width: 240px;
  overflow: hidden;
  position: relative;
  background:transparent url('images/fetching.gif') no-repeat left top;
  border-radius: 10px;
  box-shadow:
    0px 0px 1px 4px rgba(222,249,255,1),
    0px 0px 2px 4px rgba(0,0,0,0.5),
    1px 1px 2px 4px rgba(0,0,0,0.5),
    inset 0px 0px 2px 2px rgba(0,0,0,0.4)
  ;
}

/*box-shadow doesn't render on image, so hacking a covering span*/
.show-kitten div span {
  height: 320px;
  width: 240px;
  position: absolute;
  top: 0px;
  left: 0px;
  box-shadow: inset 0px 0px 2px 2px rgba(0,0,0,0.4);
  border-radius: 10px;
}

.show-kitten figcaption {
  font-size: 18px;
  color:rgba(0,44,52,1);
  text-shadow: 1px 1px 1px white;
  margin: 20px 0px;
  text-align: center;
}
As you may have noticed there are 3 background images in the CSS file, two are just background textures, whilst the other is a placeholder for the kitten image. Once you’ve dropped those in to style/images you can refresh Pocket Kitten in the browser and see what it looks like.


Now let’s take a sneaky peak at what it looks like in the simulator. Go back to the simulator add on tab and click on ‘Running’ to stop the simulator. Click on the ‘Add Directory’ button, browse to the Place Kitten folder and select the manifest.webapp file. Click open and our Pocket Kitten app will be added to the screen. Now start the simulator again and there should now be a ‘Pocket Kitten’ app with our icon. Tap it to open and our app should now be running!
All we need now is a little tapping action so the picture changes. Let’s create a javascript file: pocket-kitten.js and save it in our js folder. I’m going to use an external web service – placekitten.com, which serves different kitten images depending on parameters set in the url. This does however mean that the user will need a data connection for the app to work, so user feedback will be necessary should they not be connected.
Let’s start by showing an alert if the user is not connected:
if (navigator.onLine == false) {
  alert('Oh nos! It seems you're not online :(nSorry but this app only works if you are online, please connect and try again.');
}
Test this by saving the file, turning off your internet connection and clicking the ‘Update’ button, next to Pocket Kitten, in the simulator tab. Check it out – there’s shiny default styling! Wahay, nothing more to do here (we can now turn our internet back on).
To generate an image from placekitten.com we need to add width and height parameters to the end of the url. Different sizes produce different images. The javascript below generates random values for the width and height, creates a url for placekitten.com and then replaces the source of the image element in the HTML.
//creates url and loads image
function setImage() {
  //get value between 240 and 440 for the width
  var imageWidth = Math.floor(Math.random() * (200 + 1)) + 240;
  //get value between 320 and 520 for the height
  var imageHeight = Math.floor(Math.random() * (200 + 1)) + 320;

  //Create image source url
  var sourceUrl = 'http://placekitten.com/'+imageWidth+'/'+imageHeight;
  //ge image element
  var domElement = document.getElementById("kitten-image");

  //set new image source
  domElement.src = sourceUrl;
}

//run once on app load
setImage();
//run when clicked/tapped
document.body.addEventListener('click', function onKittenSmashed(evt) {
  setImage();
});
Add this to your javascript file, save it and go back to the simulator add on. Click on ‘Update’ button next to the Pocket Kitten app. The simulator should restart and the app load automatically. Now if you click the screen a new kitten picture should load!
Now turn around and pat yourself on the back – you just made an app which runs on Firefox OS :D
Did you notice what just happened there – you actually just built a web app, it just so happens that that really is all you need to do. Amazedev! As it is just web technology it’s worth taking a look at the WebAPI list to see all the amazing functionality which is/will be available for your apps.
Now I bet you’re wondering how you get all this onto a device. Sorry I’m not going to go into it in detail here, no doubt it’ll be tl;dr. A quick summary is you need the Android SDK installed and the Gaia code. Also a compatible device (Galaxy S2, Galaxy Nexus, Nexus One, LG Optimus to name a few). There are instructions here and more notes on it here. There’ll soon be more detail from me too, so keep an eye out.
Any more for any more?
This was a super simple introduction to Firefox OS, just to get your juices flowing. There’s loads more to discover like reading more about it and digging around with native apps on Gaia.
If you want to keep up to date with news and how development is going, you can join the mailing list or follow @Boot2Gecko and @OpenWebDevice on Twitter.
Go forth my friends, with your new knowledge and make some awesome apps :)
NB I did actually make Pocket Kitten(!) – you can see it in it’s full glory here.