
In this article we’re going to take a look at how we can test React applications. Typically applications built with a frontend framework are difficult to test; it’s tricky to emulate the actions of your users in testing, despite it being one of the most important things to test. If your tests can’t emulate what a user might do, it’s going to be tricky to have full confidence that your application works fully. Thankfully due to React’s nature it’s much easier to test when compared to other frameworks. Because React is built on the idea that your components take properties and state and produce HTML, it’s much easier. You can set up your component and assert that the outputted HTML is what you expect. In addition, as we’ll see, React provides some really useful test utilities that make it trivial to simulate user interaction and ensure that things are functioning as expected.
A sample application
As an application to work with, I’ve picked a unique idea and built…a todo app! This might not be the most exciting idea ever, but it does let us build some functionality that we can test, and it’s an idea everyone is very familiar with. When you’re working on a small application it’s very easy to manually test that everything is working, but as your application grows and if more people start to work on it it’s impossible to have confidence across your entire application. Testing might seem like a waste of time at first, but once you become quicker at writing tests and used to it, you’ll thank me!
I’ve also recorded a video that demonstrates the functionality of our app. It lets you toggle todos being done, add new todos and delete todos too. There’s nothing revolutionary in the app but it will provide a nice base to test from. You can grab all the code on GitHub too if you’d like to run it locally.
Babel and ECMAScript 2015
I’ve written the entire application in ES2015 using Babel. I’ve installed all our dependencies through npm as Node modules and webpack converts those into client side compatible files that combine to run our app in the browser. The nice thing about installing all our dependencies in Node is we can then use all those dependencies again in our tests. Additionally, running our tests in NodeJS rather than in the browser means we can avoid the complexities of running in a browser and run them entirely in the terminal.
Testing Libraries
My testing library of choice for NodeJS is Tape. Tape has a minimal API that I find helps to keep tests clear and leads to better assertions. Eric Elliott’s post on Tape does a great job of summarising the reasons why Tape is a good choice, and hopefully I’ll demonstrate them as we move through the article. It’s worth noting that we’re using Tape as a test runner here; if you have another preferred choice you could easily swap it out at this point.
I’ll also use Babel Tape Runner, a small module that configures Tape and Babel nicely. Finally, we’ll be using jsdom because in some of our tests React will expect to be within a browser, and we can use jsdom to fake out a browser in NodeJS.
Let’s get started by installing all those as developer dependencies. If you want to follow along you can checkout the first commit on the demo repo which doesn’t have any of the testing libraries installed.
npm install --save-dev tape babel-tape-runner jsdom
I’ve already got Babel and its presets configured but let’s quickly cover it. We need Babel and two of its presets, es2015 and react, to ensure everything is transpiled as we need.
npm install --save-dev babel-preset-es2015 babel-preset-react babel-core
Then we’ll create .babelrc and tell Babel that we want to use those presets:
{
  "presets": ["es2015", "react"]
}
Finally, let’s set up npm so we can run npm test to execute our tests. Edit the scripts part of the package.json file:
"scripts": {
  "test": "babel-tape-runner test/**/*-test.js"
},
This will get tape to run any files in the test directory that are suffixed with -test.
The First Component Test
The first component we will be testing is the Todo component:
import React, { Component } from 'react';

export default class Todo extends Component {
  toggleDone() {
    this.props.doneChange(this.props.todo.id);
  }

  deleteTodo(e) {
    e.preventDefault();
    this.props.deleteTodo(this.props.todo.id);
  }

  render() {
    const { todo } = this.props;

    const className = todo.done ? 'done-todo' : '';

    return (

         this.toggleDone() }>{ todo.name }
         this.deleteTodo(e) }>Delete

    )
  }
}
This component is given a todo as a prop, and renders it. It also takes two callbacks through props which it calls when the user toggles a todo or deletes it. This pattern is fairly common; the Todo component doesn’t directly manipulate the state of the world but instead calls up to a higher level component to do it. We’ll see how this is done and how to test that later in this article. For now though, there’s a few bits of functionality we need to test:
- It renders the Todo correctly – we’ll test this by checking the todo
nameproperty is rendered. - When a todo is done it gives it an extra class of
done-todo, which causes the strike through. - When a todo is clicked on it is toggled.
- When the delete link is clicked it deletes the todo.
We can test 1 by rendering the component and looking for the text we want. 2 and 3 are tested by triggering clicks on the HTML and checking the right callback is called. Note that whenever we test React components we will test them by simulating user interaction, rather than by writing code to set state as if a user had clicked a button. You should try to always avoid reaching into a React component to set its internal state, and make sure all your tests act as a user. When testing React components, the input is user action, and output is the rendered HTML.
Before we start testing there’s one more component we need. React’s test utilities used to ship as part of React but they are now separate, so we need to install them:
npm install --save-dev react-addons-test-utils
The TestUtils are fully documented on the React docs, and I recommend getting familiar with them. We’ll use a few methods in this tutorial.
Shallow Rendering
To test that the rendered component contains text we could use the React test utils to render the component to the DOM. However, the test utils also provide a method for shallow rendering. In shallow rendering you “render” the component, but only one level deep. This means no children are ever rendered, but also means that no DOM is required. With use of shallow rendering, React instantiates the component and gets back the ReactElement, which is a result of the component’s render method. If you can write your tests like this it’s encouraged, no DOM (or fake DOM) means that the tests will be a little more efficient and this can add up if you have a huge number of them. First, let’s create test/todo-test.js and do some setup:
import React from 'react';
import Todo from '../app/todo';
import TestUtils from 'react-addons-test-utils';
import test from 'tape';
function shallowRenderTodo(todo) {
const renderer = TestUtils.createRenderer();
renderer.render(We import some required dependencies and then create the function shallowRenderTodo, which takes a todo object and returns a shallow rendered version of the Todo component that we can assert on. Now let’s start with the tests:
test('Todo component', (t) => {
  t.test('rendering a not-done tweet', (t) => {
    const todo = { id: 1, name: 'Buy Milk', done: false };
    const result = shallowRenderTodo(todo);

    t.test('It renders the text of the todo', (t) => {
      t.plan(1);
      t.equal(result.props.children[0].props.children, 'Buy Milk');
    });
  });
});
Tape works by providing a test function that you call with a description and a callback, which Tape will call with an argument, which is commonly referred to as t. This is the object that you assert on or call test on to nest tests. In this test we first create a new todo and pass it to shallowRenderTodo to get a fake object that mirrors what would be rendered to a real DOM. Note the call to t.plan, Tape requires you to tell it how many assertions you’re going to make. I’ve actually found this a really nice way to self document, and it also means Tape works with async tests out of the box – it will simply wait to allow async tests to execute.
Finally, we make an assertion on the shallow rendered content that result.props.children[0].props.children is set to Buy Milk. To give you an idea of why we dive so deep into the result object, below is the full object for you to take a look at:
{
  "type": "div",
  "key": null,
  "ref": null,
  "props": {
    "className": "todo  todo-1",
    "children": [
      {
        "type": "p",
        "key": null,
        "ref": null,
        "props": {
          "className": "toggle-todo",
          "children": "Buy Milk"
        },
        "_owner": null,
        "_store": {}
      },
      {
        "type": "a",
        "key": null,
        "ref": null,
        "props": {
          "className": "delete-todo",
          "href": "#",
          "children": "Delete"
        },
        "_owner": null,
        "_store": {}
      }
    ]
  },
  "_owner": null,
  "_store": {}
}
This structure might seem a bit alien, but once you get used to working with React components that have been shallow rendered you’ll be more familiar with it. Any child elements are always contained within props.children, so all we’re doing above is going through the tree of the React component to find the text that was rendered.
Additionally, we’ll make another assertion that when we render an incomplete todo it does not get given the class of done-todo. To do this we can access the className property of the shallow rendered component, and check if it contains done-todo:
t.test('The todo does not have the done class', (t) => {
  t.plan(1);
  t.equal(result.props.className.indexOf('done-todo'), -1);
});
Now, let’s render a todo that is completed and check that it does have the correct class applied.
t.test('rendering a done tweet', (t) => {
  const todo = { id: 1, name: 'Buy Milk', done: true };
  const result = shallowRenderTodo(todo);

  t.test('The todo does have the done class', (t) => {
    t.plan(1);
    t.ok(result.props.className.indexOf('done-todo') > -1);
  });
});
Finally, we’re ready to run the tests! You should be able to run npm test to see the results of our work.
> [email protected] test /Users/jackfranklin/git/testing-react
> babel-tape-runner test/**/*-test.js

TAP version 13
# Todo component
# rendering a not-done tweet
# It renders the text of the todo
ok 1 should be equal
# The todo does not have the done class
ok 2 should be equal
# rendering a done tweet
# The todo does have the done class
ok 3 (unnamed assert)

1..3
# tests 3
# pass  3

# ok
Whilst the output from Tape isn’t the most beautifully formatted, it follows the TAP protocol. This means that there’s lots of formatters available to take the above results and turn them into something that looks much nicer. Some of my favourites are Faucet and Tap Prettify but you can find a comprehensive list on the Tape GitHub page. The good news is that all of our tests are passing!
Rendering to the DOM
Sometimes though we need to be able to have a DOM to fully render components and simulate user interactions on those components. Given that we’re running our tests in NodeJS we need to do some work to set everything up correctly. Thankfully the module we installed earlier, jsdom, does a great job of sorting all this out for us. Create the file tests/setup.js:
import jsdom from 'jsdom';

function setupDom() {
  if (typeof document !== 'undefined') {
    return;
  }

  global.document = jsdom.jsdom('');
  global.window = document.defaultView;
  global.navigator = window.navigator;
};

setupDom();
This file will check to see if document is defined, and set it up if it isn’t. Note that you’ll need to import this file before you import React, because React does some checks when it loads to see if a DOM is present. Update the top of test/todo-test.js to import this file:
import './setup';

import React from 'react';
// rest of imports and tests below
Next, we can write a test that ensures when we click on a Todo to toggle it between done and incomplete the right callback is called. If you recall from looking at the implementation of the Todo component we give it a property that it should call when a user toggles a todo. We’ll test that when we click on a todo the component does call that function. This time though we’ll be rendering into the DOM and simulating user interaction.
t.test('toggling a TODO calls the given prop', (t) => {
t.plan(1);
const doneCallback = (id) => t.equal(id, 1);
const todo = { id: 1, name: 'Buy Milk', done: false };
const result = TestUtils.renderIntoDocument(
Using renderIntoDocument from TestUtils we can take the component and render it into the DOM. Note that each renderIntoDocument renders into a detached DOM node, which means no one test can interfere with another. I pass the component doneCallback, which is a function that takes in the ID of the todo and makes an assertion that it will be equal to 1, which is the ID of the given todo in the test. If this callback never gets called then Tape will detect that we haven’t made all the assertions we planned and the test will fail.
Finally, we can use findRenderedDOMComponentWithTag to search for the paragraph element in our rendered todo component:
const todoText = TestUtils.findRenderedDOMComponentWithTag(result, 'p');
And then use TestUtils.Simulate to simulate a user interaction:
TestUtils.Simulate.click(todoText);
This click should cause our callback to be executed and therefore our assertion to run. Here’s the full test:
t.test('toggling a TODO calls the given prop', (t) => {
t.plan(1);
const doneCallback = (id) => t.equal(id, 1);
const todo = { id: 1, name: 'Buy Milk', done: false };
const result = TestUtils.renderIntoDocument(
We can write another test that looks very similar. This one tests that when we click the Delete link the correct callback is called:
t.test('deleting a TODO calls the given prop', (t) => {
t.plan(1);
const deleteCallback = (id) => t.equal(id, 1);
const todo = { id: 1, name: 'Buy Milk', done: false };
const result = TestUtils.renderIntoDocument(
And with that all our Todo component tests are complete, and passing!
 TAP version 13
# Todo component
# rendering a not-done tweet
# It renders the text of the todo
ok 1 should be equal
# The todo does not have the done class
ok 2 should be equal
# rendering a done tweet
# The todo does have the done class
ok 3 (unnamed assert)
# toggling a TODO calls the given prop
ok 4 should be equal
# deleting a TODO calls the given prop
ok 5 should be equal

1..5
# tests 5
# pass  5

# ok
This might seem like a lot of effort, and a lot of new functionality to learn, but the good news is that most React component tests will follow roughly this structure. Once you gain familiarity with the React test utils they will have you covered. Now we’ve covered a lot of the basics we’ll move at a little more speed through the rest of the tests.
Adding a Todo
The AddTodo component renders an input and a button which can be clicked to add a new todo to the page. Here’s the source for it:
import React, { Component } from 'react';
export default class AddTodo extends Component {
addTodo(e) {
e.preventDefault();
const newTodoName = this.refs.todoTitle.value;
if (newTodoName) {
this.props.onNewTodo({
name: newTodoName
});
this.refs.todoTitle.value = '';
}
}
render() {
return (
)
}
}
Following the same pattern as the Todo component, this component is given a callback to call with the name of the latest todo. Create test/add-todo-test.js and add the following:
import './setup';
import React from 'react';
import AddTodo from '../app/add-todo';
import TestUtils from 'react-addons-test-utils';
import test from 'tape';
test('Add Todo component', (t) => {
t.test('it calls the given callback prop with the new text', (t) => {
t.plan(1);
const todoCallback = ({ name }) => {
t.equal(name, 'Buy Milk');
}
const form = TestUtils.renderIntoDocument(
As you can see this structure matches the other tests pretty nicely. The only change is we now reach into the DOM twice to manipulate different elements. In the first case we grab the input and update its value to Buy Milk, as if the user had typed it in. Then we find the button element and simulate a click on it. This causes todoCallback to be called, which asserts that the object it was given has a name property of Buy Milk.
Testing the Todos component
We’ve tested our two smaller components, Todo and AddTodo, and now it’s time to move onto Todos, which is the largest component that contains our entire app. Its source is below:
import React, { Component } from 'react';
import Todo from './todo';
import AddTodo from './add-todo';
export default class Todos extends Component {
constructor() {
super();
this.state = {
todos: [
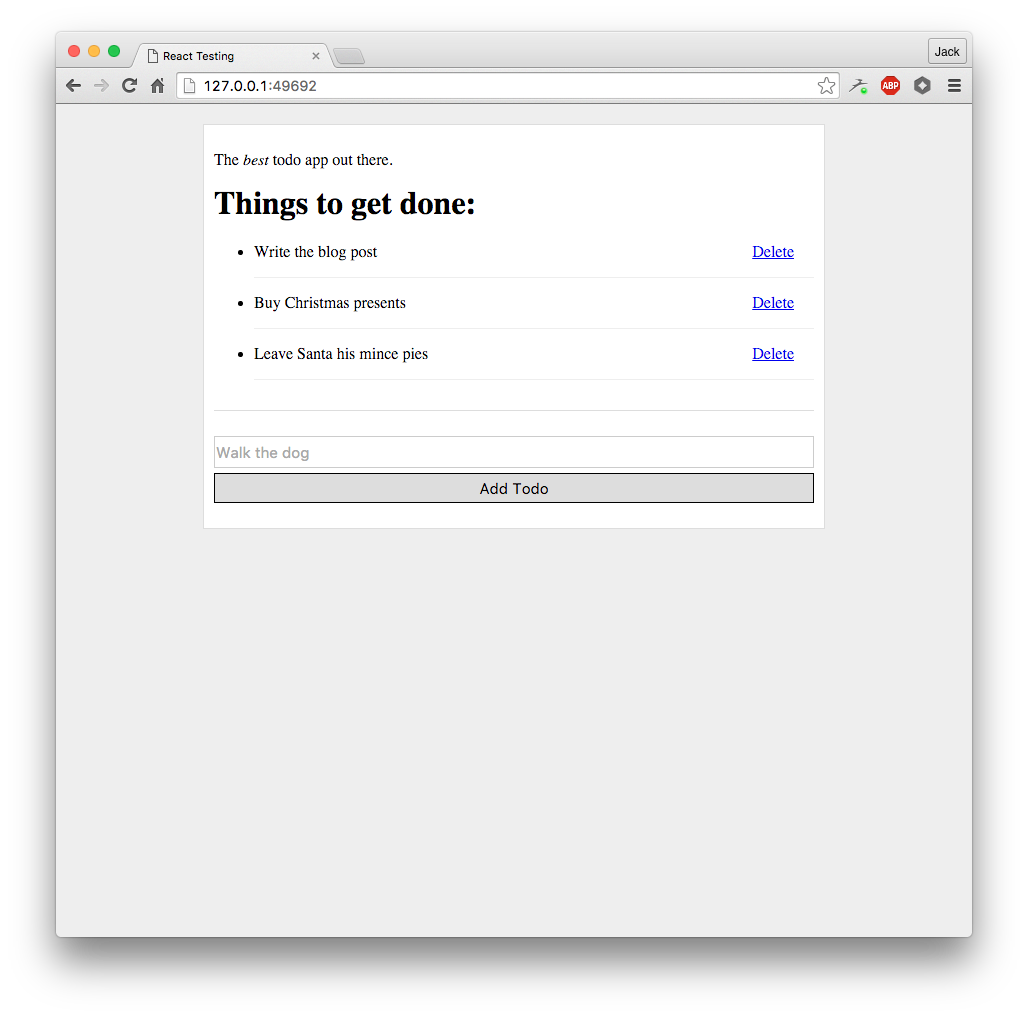
{ id: 1, name: 'Write the blog post', done: false },
{ id: 2, name: 'Buy Christmas presents', done: false },
{ id: 3, name: 'Leave Santa his mince pies', done: false },
]
}
}
toggleDone(id) {
const todos = this.state.todos.map((todo) => {
if (todo.id === id) {
todo.done = !todo.done;
}
return todo;
});
this.setState({ todos });
}
addTodo(todo) {
const lastTodo = this.state.todos[this.state.todos.length - 1];
todo.id = lastTodo.id + 1;
todo.done = false;
this.setState({
todos: this.state.todos.concat([todo])
});
}
deleteTodo(id) {
this.setState({
todos: this.state.todos.filter((todo) => todo.id !== id)
})
}
renderTodos() {
return this.state.todos.map((todo) => {
return (
this.toggleDone(id)}
deleteTodo={(id) => this.deleteTodo(id)} />
);
});
}
render() {
return (
The best todo app out there.
Things to get done:
{ this.renderTodos() }
this.addTodo(todo)} />
)
}
}
In this case I’ve hard coded our state with three items, but you can imagine that this might instead come from a database or API request. The Todos component is the only component that knows how to update the state, so it has methods called toggleDone, addTodo and deleteTodo that do just that. When it renders the Todo and AddTodo components it passes them a callback function (the ones we tested earlier) that trigger the methods that cause changes to the state.
The tests we’ll write for the Todos component will be a little more overarching – we’ll test that when you add a new todo item, it is indeed rendered and the length of the ul containing the items changes from 3 to 4. Rather than just testing a callback we’ll actually assert on changes to the DOM output.
The first test will test how many todo items it renders. We’re expecting there to be three, to match the initial three we have in the state. Once again we can do this using shallow rendering – avoiding a “real” DOM render whenever possible is encouraged.
function shallowRender() {
const renderer = TestUtils.createRenderer();
renderer.render(Marking a todo as done
Next, let’s write a complete test for testing that we can mark a todo item as done. To do this we’ll simulate a user clicking on a todo item and then find that todo item in the DOM, asserting that it’s been given the class done-todo.
t.test('Marking a todo as done', (t) => {
t.plan(1);
const result = TestUtils.renderIntoDocument(Here we render Todos into the DOM. We then need to find the first paragraph with the toggle-todo class. To do this we use scryRenderedDOMComponentsWithClass, a rather oddly named method that searches for all items with a given class. The name scry here comes from “Scrying”:
Scrying (also called seeing or peeping) is the practice of looking into a translucent ball
So you can think of it as looking into the DOM to see what we might find. Thanks to @darkliquid on Twitter for clarifying that to me!
In our case we only need the first toggle button (there’s no reason you couldn’t use the second or third if you wanted), so we just grab the first item returned before simulating a click event on it.
Finally I then use findRenderedDOMComponentWithClass to pull out the todo with a class of todo-1 (each todo gets a class based on its id), and then assert that it has the done-todo class using the classList API.
An important note here is that findRenderedDOMComponentWithClass expects there to be just one element found, and will error if there’s 0 or >1 items found. If you need to find an element where you’re expecting multiple instances, use the scryRenderedDOMComponentsWithClass alternative.
Deleting a Todo
Next up we’ll test deleting a todo. This follows a very similar pattern to the previous test, with the only difference being the assertion. In this case we assert that the number of todo items found in the DOM after deleting one will be two, rather than three:
t.test('Deleting a todo', (t) => {
t.plan(1);
const result = TestUtils.renderIntoDocument(Adding a Todo
The final key piece of functionality to cover is adding a todo. Once again this test simply reuses the approaches we’ve used throughout the article. First we pull out the form input and update its value before clicking the button on the page. The assertion here ensures that when we do add a new todo we end up with four of them in the DOM:
t.test('Adding a todo', (t) => {
t.plan(1);
const result = TestUtils.renderIntoDocument(With that we can now run all our tests and make sure we’re green:
TAP version 13
# Add Todo component
# it calls the given callback prop with the new text
ok 1 should be equal
# Todo component
# rendering a not-done tweet
# It renders the text of the todo
ok 2 should be equal
# The todo does not have the done class
ok 3 should be equal
# rendering a done tweet
# The todo does have the done class
ok 4 (unnamed assert)
# toggling a TODO calls the given prop
ok 5 should be equal
# deleting a TODO calls the given prop
ok 6 should be equal
# Todos component
# it renders a list of todos
ok 7 should be equal
# Marking a todo as done
ok 8 (unnamed assert)
# Deleting a todo
ok 9 should be equal
# Adding a todo
ok 10 should be equal

1..10
# tests 10
# pass  10

# ok
And we are!
Running in the browser
Occasionally we might want to run the tests in a browser to ensure that everything’s working not only in Node, but in Chrome, Firefox or other browsers. Thankfully we can do this using Browserify to first compile our tests into a client side bundle that we can then pass to tape-run to execute them in a browser. Tape Run by default runs the tests through Electron, but you can configure it to run tests through Chrome, Firefox or other browsers.
First, install the dependencies we need:
npm install --save-dev browserify babelify tape-run
Then configure a script to build our app and load up tape-run:
"browser-test": "browserify test/*-test.js -t [ babelify --presets [ es2015 react ] ] | tape-run"
This script takes every test file, runs them through Browserify (using Babelify to transform the files) and then runs them in the background through Tape in a browser. If you run npm run browser-test and give it a few minutes, you should see the same Tape output in your console. You can try it again but add -b chrome or -b firefox to the end of the above command to run against a specific browser, which is really useful if you get reports of a browser specific bug.
Generally I’d recommend running tests in Node in regular development and test them in browsers now and then, perhaps before a deploy.
Testing State Changes
What you might have noticed so far is that we’ve not directly tested any of the logic for manipulating the state. We’ve assumed that the state is manipulated correctly given differences in the rendered output. However, when working with functions that manipulate the state it’s really useful to have unit tests that cover them. This makes it easy to test them quickly without having to wait for the tests that fire up your components. Our Todos component has a few functions that could do with some testing.
Pulling state functions out
To make testing the functions easier, let’s pull them out into a plain old JavaScript object (POJO), and then make the Todos component import it. The good news is that we have tests to check we didn’t break anything! First create app/state-functions.js. Each function will take the state as the first argument, and then any extra data it needs. It should return the new state.
export function toggleDone(state, id) {
  const todos = state.todos.map((todo) => {
    if (todo.id === id) {
      todo.done = !todo.done;
    }

    return todo;
  });

  return { todos };
}

export function addTodo(state, todo) {
  const lastTodo = state.todos[state.todos.length - 1];
  todo.id = lastTodo.id + 1;
  todo.done = false;

  return {
    todos: state.todos.concat([todo])
  };
}

export function deleteTodo(state, id) {
  return {
    todos: state.todos.filter((todo) => todo.id !== id)
  };
}
Then, in Todos, we can import the new functions and update our existing functions to call the newly extracted ones:
import {
  toggleDone,
  addTodo,
  deleteTodo
} from './state-functions';

// further down

toggleDone(id) {
  this.setState(toggleDone(this.state, id));
}

addTodo(todo) {
  this.setState(addTodo(this.state, todo));
}

deleteTodo(id) {
  this.setState(deleteTodo(this.state, id));
}
It’s worth noting that what we’ve implemented here is effectively a budget version of Redux. For larger JavaScript applications I’d highly recommend using Redux (you can even use it without React). The video series on Egghead.io is a great place to start.
The good news is I can run npm test to confirm that I haven’t broken any existing functionality, and now we can write some unit tests for the state functions. Create test/state-functions-test.js and let’s write our first one:
import {
  addTodo,
  toggleDone,
  deleteTodo
} from '../app/state-functions';

import test from 'tape';

test('toggleDone', (t) => {
  t.test('with an incomplete todo it updates done to true', (t) => {
    t.plan(1);

    const initialState = {
      todos: [{ id: 1, name: 'Buy Milk', done: false }]
    };

    const newState = toggleDone(initialState, 1);

    t.ok(newState.todos[0].done);
  });
});
These tests are much more simple to set up as they don’t require a DOM or any React specific test utilities – we’re just testing plain JavaScript functions here. Rather than go through each test I’ve written here I suggest you take a look on GitHub where I’ve written all the tests for the state functions.
Enzyme
This was going to be the end of this article, but as I was half way through writing it AirBnB released enzyme, a library that makes testing React components much easier. It looked really interesting and something I was keen to have a play with, so I thought I’d use this as a good chance to rewrite some tests in it and document how it goes.
We won’t go into huge amounts of detail on this because I could write an entire article about it, but let’s rewrite some tests and see how it goes. You can check out the Git commit where I rewrote all the tests.
Let’s start with test/todo-test.js first of all. The first change is to import shallow and mount from Enzyme. We’ll see what those do shortly. We can also delete the react-addons-test-utils import, because we won’t be needing it. Our imports now look like so:
import  './setup';

import { shallow, mount } from 'enzyme';

import React from 'react';
import Todo from '../app/todo';

import test from 'tape';
Firstly, let’s look at shallow, which is the Enzyme method for shallow rendering. We can update our shallowRenderTodo method to make use of this:
function shallowRenderTodo(todo) {
return shallow(Finally we can then use the Enzyme API to query the result in a much nicer fashion than we were previously. I can call find to search through the results, and then call text() to get the text. Similarly I can use the hasClass function provided by Enzyme to see if an element has been given a particular class:
t.test('rendering a not-done tweet', (t) => {
  const todo = { id: 1, name: 'Buy Milk', done: false };
  const result = shallowRenderTodo(todo);

  t.test('It renders the text of the todo', (t) => {
    t.plan(1);
    t.equal(result.find('p').text(), 'Buy Milk');
  });

  t.test('The todo does not have the done class', (t) => {
    t.plan(1);
    t.equal(result.hasClass('done-todo'), false);
  });
});
Notice how much cleaner that looks! Rather than continue with these tests, let’s find another test that does use the DOM to see how Enzyme makes that much easier for us.
Let’s take the test “deleting a TODO calls the given prop” and rewrite it using Enzyme:
t.test('deleting a TODO calls the given prop', (t) => {
t.plan(1);
const deleteCallback = (id) => t.equal(id, 1);
const todo = { id: 1, name: 'Buy Milk', done: false };
const result = mount(
We use mount to render the component into the DOM which returns an object that has the Enzyme methods on it. We can use that find method once more to locate the anchor we want to click. We then use Enzyme’s simulate method, which takes a string argument that’s the type of event we want to fire. Notice how succinct this approach is; Enzyme does a great job of making tests much more readable and clean. Under the hood it’s still using the methods that we used when we directly used react-addons-test-utils, so it’s well worth you being aware of them, but Enzyme adds a lovely layer on top.
Other Tools
The tools that I used in this article have become my preferred stack when testing React applications, but that doesn’t mean they have to be yours too. Now you’ve a solid grounding in the world of React testing you should definitely take some time to explore other options and find what works best for you. Some popular libraries that you might want to check out include:
Conclusion
I hope this article has given you confidence to go forth and test your React applications. In this article we’ve looked at not only how to test your applications but also why – the benefits of doing so really pay back in the long run, even if at first it might feel a little over the top. The common complaint is that you end up writing twice as much code, the implementation and the tests, but this will save you accidental bugs and broken deploys a-plenty. It might sleem slow at first but once you get familiar with the concepts of testing and your tools of choice, you’ll speed up and eventually start wondering how you ever coped without testing!
I highly recommend further exploring the Enzyme library by AirBnB, the functions that it exposes make it much easier to test React components in a more succinct way; it uses a very ‘jQuery-esque’ syntax and should help read React tests and understand what’s going on. It’s a great wrapper around the React test utils and one that’s worth your time to learn.
If you have any questions you are welcome to ping me on Twitter or raise an issue on the GitHub repo and I’d love to chat. Finally, huge thanks to Mateusz Zatorski for his time reviewing this post, and to the entire 12Devs team for letting me take part once again.