
It’s Christmas Day. Everyone has had their fair share of turkey. Grandad’s asleep on the sofa, your Nan is listening to the latest Michael Buble album on the CD player on full volume and your youngest sibling has locked themselves in their room playing on their new Playstation 4.
The unenviable task of washing the dishes from the epic meal is still to be done and guess what? You’ve been volunteered to do them, when all you really want to do is watch Doctor Who and slowly make your way through the six tins of Quality Street chocolates your Dad acquired on the lead up to Christmas thanks to the 2 for the price of 3 offer at Tesco.
What if I was to offer you a dishwasher to help you out? Unless your a Christmas sadist you’d probably jump at the chance at automating dish cleaning.
Grunt is a bit like a dishwasher, except more efficient with water usage and able to do more than one thing. If it were a kitchen appliance, it could probably cook, clean, wash all in one. Sadly (or happily depending on your fondness of the oven) it is not a kitchen appliance. Grunt is a task runner that takes the regular chores of web development and automates them saving you time and letting you concentrate on the interesting parts of your project.

What tasks Grunt will run is completely up to you. There are over a thousand tasks available – from Sass compliation and minification to code linting and unit testing. Sadly, it doesn’t do dishes.
With this abundance of tasks, Grunt has become one of the most useful and popular tools in the web developer’s toolbox. It doesn’t matter if your project is mostly CSS; if it’s JavaScript heavy or if it’s a mixture of both, Grunt is useful for every web project. If you haven’t had the time to sit down and play with Grunt so far, you really owe it to yourself to see what you’re missing this holiday season – the short time it takes to learn Grunt pays for itself very quickly.
In this article we’ll take a look at how to get started with Grunt before unwrapping some of the best tasks and techniques for getting the most out of it. If you already use Grunt feel free to advance straight past the ‘getting started’ part and skip to the good bit.
A quick guide to installing Grunt
Grunt (and the tasks created for Grunt) are written in JavaScript, so we need to use Node.js to run them on the command line.
Node.js can be installed quickly and easily on Windows, Mac or Linux using the install wizard available for download on the Node.js site. Installing Node.js also installs Node Package Manager (known as NPM) which we will use to download both Grunt and any new tasks for Grunt.
Once installation is complete, we need to install the Grunt Command Line Interface (CLI). Open up a Terminal window or the Windows Command Prompt and type the following line. Depending on permissions, you may need to prefix the command sudo or run the Windows Command Prompt as an administrator:
npm install -g grunt-cli
The -g flag ensures we install Grunt CLI globally – it’s the only part of Grunt that will be installed globally. We won’t install grunt or any of its tasks globally so that we can run the latest version of each plugin on newer projects whilst maintaining backward compatibility with our older projects.
We can now type grunt from any directory and if a Grunt file exists, it will run. You can run it now if you like, but it’ll tell you it can’t find a valid Grunt file.
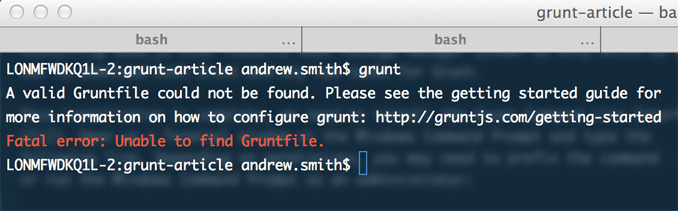
Told you.
Creating package.json
Now we’ve installed Grunt let’s create a new project.
Once we have a folder, we’ll need to create a package.json and Gruntfile.js in our project folder. The package file will store some simple details about our project together with a list of the Grunt/Node modules required by Grunt to run our tasks. The Gruntfile will contain the instructions for the tasks we’ve included.
Using Terminal/Command Prompt navigate to your project’s directory (or create a new, empty directory).
We can create a package.json file by running:
npm init
The init command will ask a set of questions, some of which you won’t want to answer or won’t know the answers to. You can hit enter on all the questions to skip and use the default. If you want to change any of your answers later on, you can do so by directly editing package.json.
We’ll need to add Grunt to our package.json so Grunt CLI knows we want to use it. We can do this by running:
npm install grunt --save-dev
Grunt will now be added as a dependency to our project, and a folder called node_modules will be added to our project folder for all our local Grunt tasks.
If we open our package.json file in a text editor, it’ll look similar to the one below (don’t worry if it doesn’t look exactly the same):
{
    "name": "my-awesome-site",
    "version": "0.0.1",
    "description": "My awesome Christmas site",
    "author": "Andi Smith",
    "license": "BSD-2-Clause",
    "devDependencies": {
        "grunt": "~0.4.2"
    }
}
The property devDependencies defines a list of the tasks we have installed together with their approximate version numbers. By listing the tasks in our package.json file, if another developer comes on board to our project, they can simply type npm install to install all of the project’s dependencies in one go.
Creating a Gruntfile
Our Gruntfile will require a basic skeleton. Create an empty Gruntfile.js with the following structure:
module.exports = function(grunt) {

    grunt.initConfig({
        pkg: grunt.file.readJSON('package.json')
    });

    // task setup
    grunt.registerTask('default', []);
};
This file will form the basis for telling Grunt what tasks we want to run. If you type grunt in to Terminal/Command Prompt when in this directory now, Grunt will run our default list of tasks. As our default list of tasks is currently empty, although running will be successful it won’t actually do anything. Let’s look at installing a task.
Installing Grunt plugins
Installing new Grunt plugins is a relatively straightforward process:
- Find the plugin you want to use.
- Go to your project folder in Terminal/Windows’ Command Prompt and type
npm install [task-name] --save-dev - Load the task in
Gruntfile.jsusinggrunt.loadNpmTasks(unless you are using a plugin such asgrunt-load-tasks) - Configure the task within
grunt.initConfig - Run Grunt!
#### Step 1: Finding the plugin
Let’s add a simple task to measure JavaScript code quality – JSHint. Every time we run Grunt, it’ll run a check against JSHint to ensure our code is conforming. Searching for “grunt JSHint” in the NPM registry brings back the result grunt-contrib-jshint.
There are a number of common tasks for Grunt which are marked as grunt-contrib. These tasks include everyday useful functionality such as copying and cleaning files or a directory; and JSHint.
#### Step 2: Installation
We need to add the task grunt-contrib-jshint to our node_modules folder and our package.json. Go to our project folder in Terminal/Command Prompt and type:
npm install grunt-contrib-jshint --save-dev
Step 3: Loading the task
Next, open up our Gruntfile.js. We first need to add a command to load the task. Change our Gruntfile.js to include the following line after our grunt.initConfig closing tag:
grunt.loadNpmTasks('grunt-contrib-jshint');
Your Grunt file should now look like this:
module.exports = function(grunt) {
    grunt.initConfig({
        pkg: grunt.file.readJSON('package.json')
    });

    grunt.loadNpmTasks('grunt-contrib-jshint');

    // task setup
    grunt.registerTask('default', []);
};
Step 4: Configuring the task
Next we need to add a jshint section to grunt.initConfig to set our configuration. Within the jshint section we will create a task called dev that looks for all the JavaScript files within our /src/js/ folder and run them through the default JSHint options.
module.exports = function(grunt) {
    grunt.initConfig({
        pkg: grunt.file.readJSON('package.json'),

        jshint: {
            dev: {
                src: ['/src/js/**/*.js']
            }
        }
    });

    grunt.loadNpmTasks('grunt-contrib-jshint');

    // task setup
    grunt.registerTask('default', []);
};
Note the comma after the pkg line.
Our src property contains an array of files to match. We could either specify the exact file name, or use wildcards to specify a folder or part of a file name. Using the wildcard * will include any matching filename. Using **/* will include any files in/or outside of folders within the /src/js folder.
#### Step 5: Here we go!
To see our task in action, go to Terminal or the Windows Command Prompt and type:
grunt jshint
JSHint will now run against any files that match the expression in src.
If we want to run JSHint everytime we run Grunt, we can add it to our default custom task:
grunt.registerTask('default', ['jshint']);
Grunt treats a task called default as the default whenever a task is not specified, so we can type grunt to run JSHint and any other tasks we add to the default task array.
Going further
Like most tasks, JSHint has various options that can be configured. For each plugin, these options can be found on their NPM registry or Github page. To add a check for curly braces within our code block, we will change our JSHint task to:
jshint: {
    options: {
        curly: true
    },
    dev: {
        src: ['/src/js/**/*.js']
    }
}
If we have files in our js folder that we do not wish to run through JSHint (such as jQuery or Modernizr), we can excluding them by listing them with a prefix ‘!’. For example, to exclude jQuery we could change our src line to:
src: ['/src/js/**/*.js', '!/src/js/jQuery-1.10.2.min.js']
To exclude an entire folder of vendor libraries we could change our src line to:
src: ['/src/js/**/*.js', '!/src/js/vendor/**/*.js']
If we wanted to run JSHint in a different custom tasks, we can create a new set of tasks within our Gruntfile:
grunt.registerTask('check-code', ['jshint', 'some-other-task']);
Adding additional tasks to Grunt is as simple as following the same five step process. You can find more details of how to get started with Grunt on the official website.
10 tips and tricks for making life easier with Grunt
If you’re a seasoned Grunt user, or your just looking for ways to optimise, optimise, optimise; here are some configuration tips and must-have tasks for making your life even easier with Grunt.
Keeping separate source and distribution folders
With many Grunt tasks making changes to our source files, it’s important to keep a separation between what we’ve created and what has been changed by Grunt tasks; otherwise our source keeps changing and we won’t know what’s been done by man or machine.
The easiest way to do this is to have separate source and distribution folders. Developers on your project will only ever edit files within the source folder, while Grunt will only create new files within the distribution folder.
I prefer to call my source and distribution folders src and dest; although any other names are equally valid. The important thing is to keep a separation of source and distribution files. Some projects include the source files in the root and output to a distribution folder. In my personal experience, I’ve found this to be a more difficult configuration as the two folders are not at the same level.
Let’s assume a file structure like follows:
dest/src/css/img/js/index.html
Gruntfile.jspackage.json
On build, we can copy our files in to dest after Grunt has made all it’s changes using a task such as grunt-contrib-copy.
When tasks go wrong
If running a grunt task doesn’t go quite how you expected, try re-running it with the -v flag. V stands for verbose and it will often provide you with a wealth of information about how each task works, the files it finds and what it produces.
Autoprefix your CSS
If like me you are bored with having to continually type -moz-this and -webkit-that, then Grunt Autoprefixer may be a dream come true for you.
This dreamy task will look through your CSS and see where you need to include a vendor prefix for browser compatibility, based on a browser matrix you specify. It will then add all the prefixes needed, saving you time and effort having to remember and write all the prefixes yourself.
For example before autoprefixer runs we write our CSS to conform to the standards, like this:
.santa {
    transform: scale(2);
    transition: transform 200ms;
}
Autoprefixer will figure out what’s required, and change our code to:
.santa {
    -webkit-transform: scale(2);
    -moz-transform: scale(2);
    -ms-transform: scale(2);
    transform: scale(2);
    -webkit-transition: -webkit-transform 200ms;
    -moz-transition: -moz-transform 200ms;
    transition: transform 200ms;
}
Handy, don’t you agree? Autoprefixer allows us to specify the browsers we wish to support. Autoprefixer uses data from [Can I Use][can-i-use] to determine what features are supported; and the code options used to define each browser are the same as the Can I Use codes:
- Use
last n versionto support the last n versions of each browser (wherenis a number). - Use
> n%to support browsers with more thann%market share. - Use
browser nto support a specific version of a browser orbrowser > nto support a browser version greater thann. Wherebrowseris:iefor Internet Explorer (e.g.ie 8orie > 9)fffor Mozilla Firefoxsafarifor Mac/Windows Safarioperafor Operachromefor Google Chromeandroidfor the Android browseriosfor iPhone/iPadbbfor Blackberry
Autoprefixer is a valuable task for every web developer and as it runs within Grunt its preferrable over running a client-side library like prefix-free as it doesn’t require any additional effort at runtime.
You can find out more details in the grunt-autoprefixer readme.
Add all the tasks!
Adding tasks one by one is perfectly acceptable, but you can wrap your task loading in to one convienent line and never need to worry about forgetting to add a new task again. There are a couple of ways of doing this, the first is to use [matchdep]. Simply run npm install matchdep --save-dev from Terminal/Command Prompt and then you can include this line in your Grunt file:
require('matchdep').filterDev('grunt-*').forEach(grunt.loadNpmTasks);
If you have dependencies in your package.json that are not devDependencies you’ll need to add a second instruction with filter rather than filterDev.
A second way is using load-grunt-tasks. First install the task (npm install load-grunt-tasks --save-dev) and then include this line in your Grunt file:
require('load-grunt-tasks')(grunt);
For most situations, this configuration will be enough, but if you load any grunt tasks that do not follow the grunt- naming convention, you’ll need to modify your configuration using the instructions on the load-grunt-tasks page.
For both techniques, all other grunt.loadNpmTasks lines can be removed.
Watching files
Rather than re-running Grunt every time we make a change, we can use Grunt Watch to watch for changes to our files.
With watch, we can specify folders we wish to monitor and when changes are made, watch will trigger the tasks we specify. We can also attach Live Reload to the task to refresh our browser window whenever changes are applied.
We want to keep this process as quick as possible, so break your watch task settings in to categories of files so we don’t need to run all our tasks again.
watch: {
    options: {
        livereload: true
    },
    css: {
        files: ['src/css/**/*.css'],
        tasks: ['autoprefixer', 'copy:css']
    },
    scripts: {
        files: ['src/js/**/*.js'],
        tasks: ['jshint', 'copy:scripts]
    }
}
You can find out more details in the grunt-contrib-watch readme.
Run a local server from Grunt
If it feels like you’re always setting up IIS or Apache localhost configurations, then Grunt Connect is likely to be exactly what you’ve been dreaming of.
Using this task, Grunt will run a localhost server on a port you specify. Simply navigate in your browser to the URL you’ve created and Bob’s your uncle (and he’s brought round Christmas cake).
Within our Grunt file, we simply add a task specifying the port and the directory to point to:
connect: {
  task: { // give your task a name
    options: {
      port: 3000, // configure your port here
      base: ./dest // configure your site distribution path here
    }
  }
}
You can find out more details in the grunt-contrib-connect readme.
Running tasks on changed files
So previously we have set up watch to re-copy files when they have been changed and we’ve run a local server to host our files. But if you’re on a big project, reloading all the files (even if it’s a subset of just JavaScript) can take a while, and we want to refresh now, not in 20 seconds. This is where Grunt Newer comes in.
The Grunt Newer task can be appended to any task, and it will ensure that only the files that have changed are copied over. So if you’ve 5 JavaScript files and you’ve only modified 1, it only copies 1. To use Grunt Newer, simply append newer as a prefix to any task. For example, we could change our watch task:
watch: {
    options: {
        livereload: true
    },
    css: {
        files: ['src/css/**/*.css'],
        tasks: ['newer:autoprefixer', 'newer:copy:css']
    },
    scripts: {
        files: ['src/js/**/*.js'],
        tasks: ['newer:jshint', 'newer:copy:scripts]
    }
}
You can find out more details in the grunt-newer readme.
Removing unused CSS
Grunt UnCSS is a (still in developement) task for inspecting HTML and removing unused CSS selectors. With many projects using front-end frameworks or boilerplates such Bootstrap it is becoming common for sites to have many unused styles; even if you are not using a boilerplate unused styles can creep in where there are multiple developers working on a project.
By specifying the HTML files we wish to inspect for styles, UnCSS will take both the CSS from these files and the selectors and work out what is and isn’t being used, producing a new CSS file with just the selectors being used.
uncss: {
    dist: {
        files: {
            'dist/css/common.css': ['src/index.html','src/christmas.html']
        }
    }
}
You can find out more details in the grunt-uncss readme.
Avoid check-in clashes with .gitignore
Grunt makes it easy to provide all your developers with the same tools, but if you check in every file to a project with multiple developer contributions you may find yourself dealing with a few conflicts whenever you git pull.
You can avoid some heartache by ensuring you add node_modules to your .gitignore file. Any onboarding developers simply need to type npm install to get involved.
Similarly, adding your distribution folder (e.g. dest) to .gitignore will ensure compiled code does not conflict. The same applies for CSS generated by LESS or Sass – avoid the pain of commit conflicts by not checking the css folder in.
Keeping an eye on complexity
If you have multiple developers working on your project, you can use a tool such as Grunt Plato to give an oversight on code quality. Plato uses methods such as the number of parameters in a function; the number of dependencies and the number of distinct paths through a block of code to determine quality.
Running the grunt task creates a report which gives an in-depth analysis of your codebase.
Do more with Grunt!
The tasks listed above are just some of the tasks available for Grunt. There are many, many, many more available and worth your time investigating. The tasks you’ll want to use will depend on the projects you build. For instance, if you use Sass you’ll definetely want to check out grunt-contrib-sass. If I have a requirement to do something with Grunt I will simply Google search grunt followed by what I want to do and generally I will find a task that matches my requirements. If not, Grunt tasks are written in JavaScript so maybe someday soon you’ll create your own Grunt plugin?